Step-by-Step Guide: How to Automatically Install or Reinstall any OS on your VPS
QuickServers enables customers to easily automate the installation or reinstallation of operating systems on their VPS through an automated and user-friendly process. By simply logging into the customer portal, customers can select the OS they want from a list of available options, and the installation process will be automated and monitored through the portal. This hassle-free experience saves customers time and effort, and reduces the likelihood of errors or disruptions during the installation process. Once the installation is complete, customers will receive a confirmation email and can start using their VPS with the new OS credentials. QuickServers' commitment to providing a seamless and automated OS installation process reflects its dedication to delivering exceptional customer service, ensuring that customers can easily manage their VPS operating systems without requiring technical expertise or complex installation procedures.
Automating the OS installation process on your VPS with QuickServers comes with several benefits, including:
- Saves time and effort by eliminating the need for manual installation processes
- Makes the process more user-friendly and accessible, even for non-technical customers
- Reduces the likelihood of errors and increases the consistency of the installation process
- Enables customers to easily manage and switch between different operating systems, based on their needs and preferences
- Streamlines the management of VPS and ensures that customers can quickly start using their VPS with the new OS credentials
- Offers peace of mind, knowing that the installation process is automated and monitored, minimizing the risk of issues or disruptions.
Steps to Automatically Install or Reinstall any OS on your VPS in your QuickServers Account Dashboard:
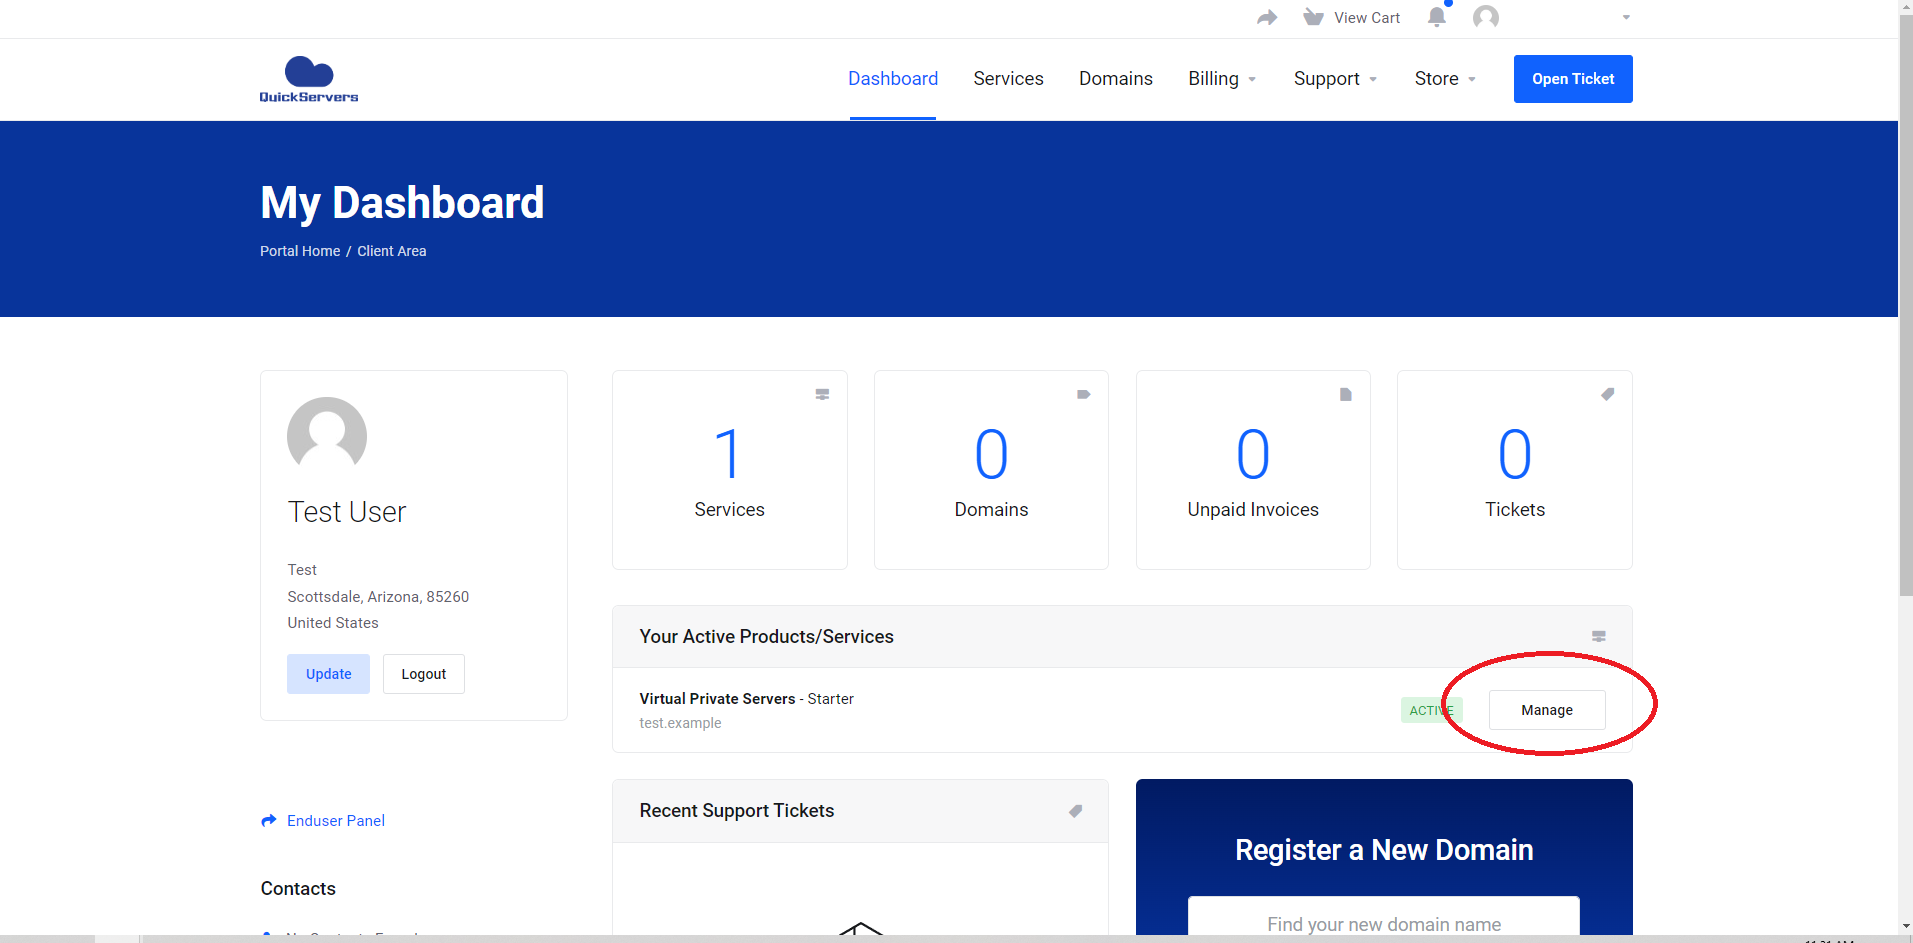
Step 1: Log in to your QuickServers client portal using your credentials. Once you're logged in, navigate to the "Services" section and click on the VPS that you want to access.
Step 2: Next to each VPS in your Active Products/Services section, you will see a "Manage" button on the right. Click "Manage" on the VPS you want to access.
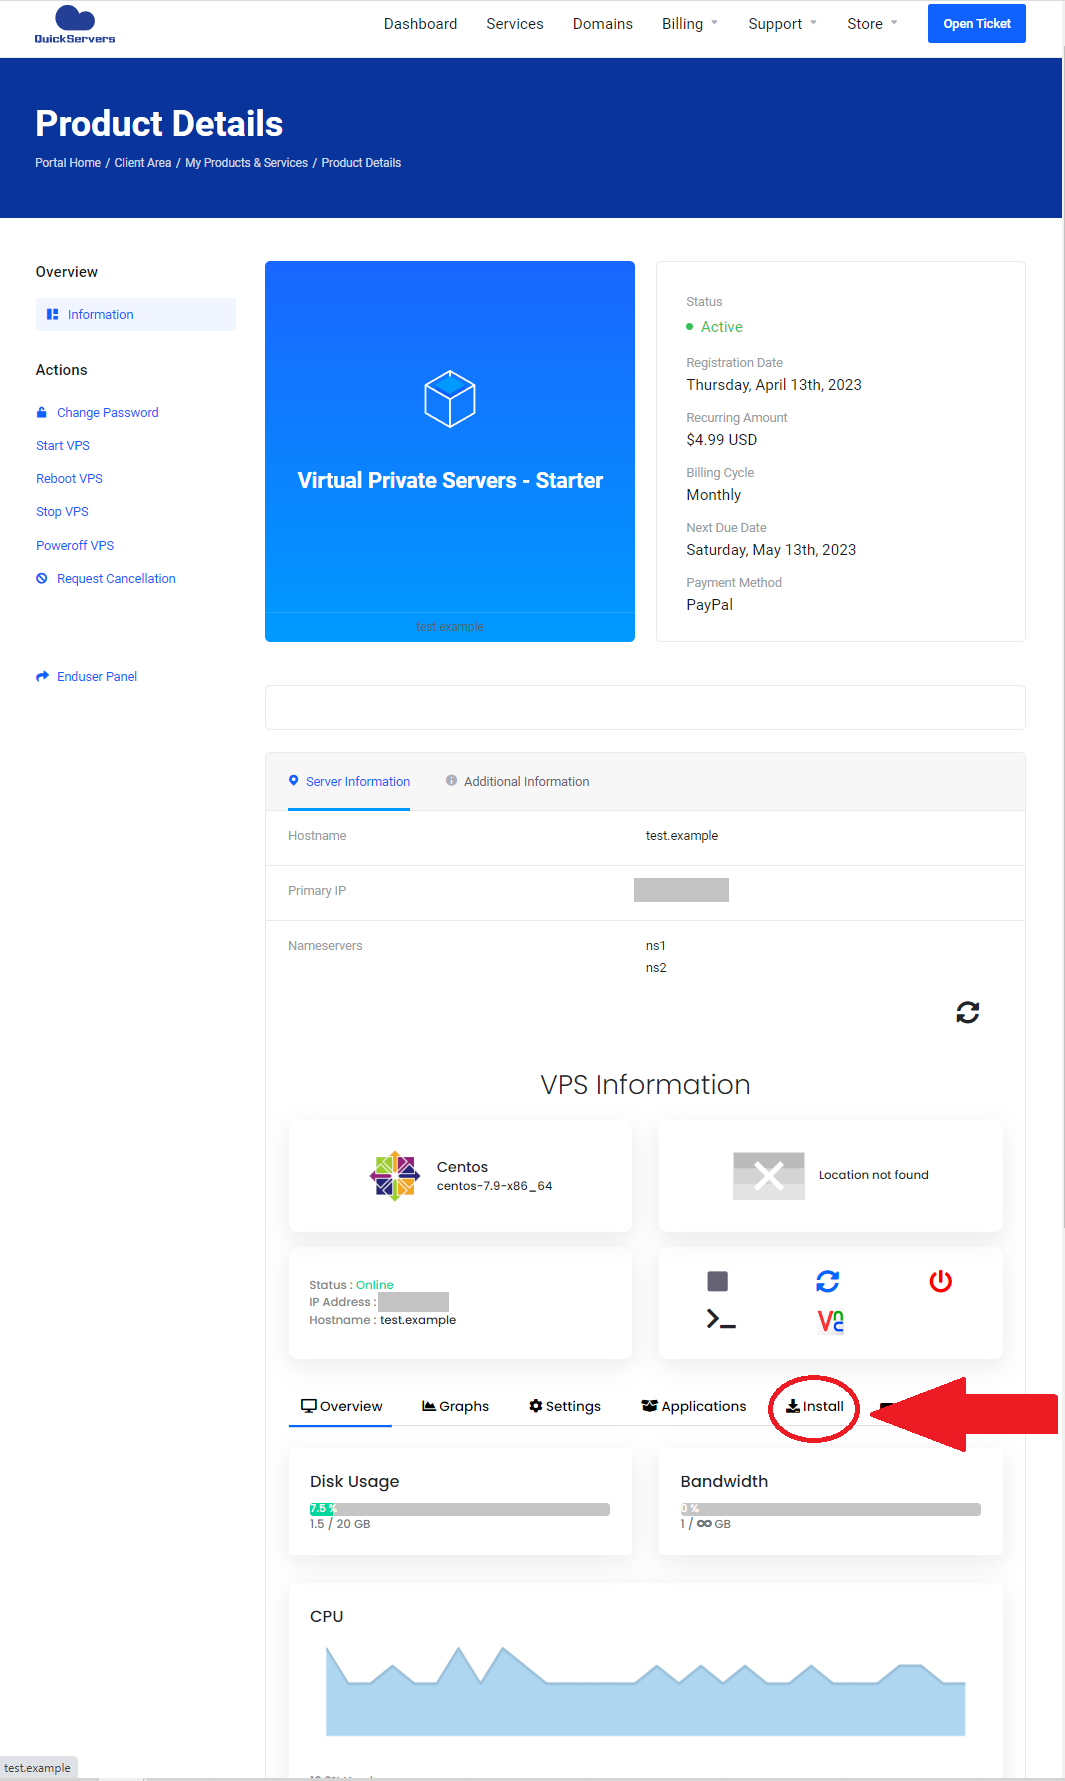
Step 3: Scroll down and click on "Install" which can be found in the server management tab. It might take a few seconds to load the VPS Server Information, where the VPS management options are located.
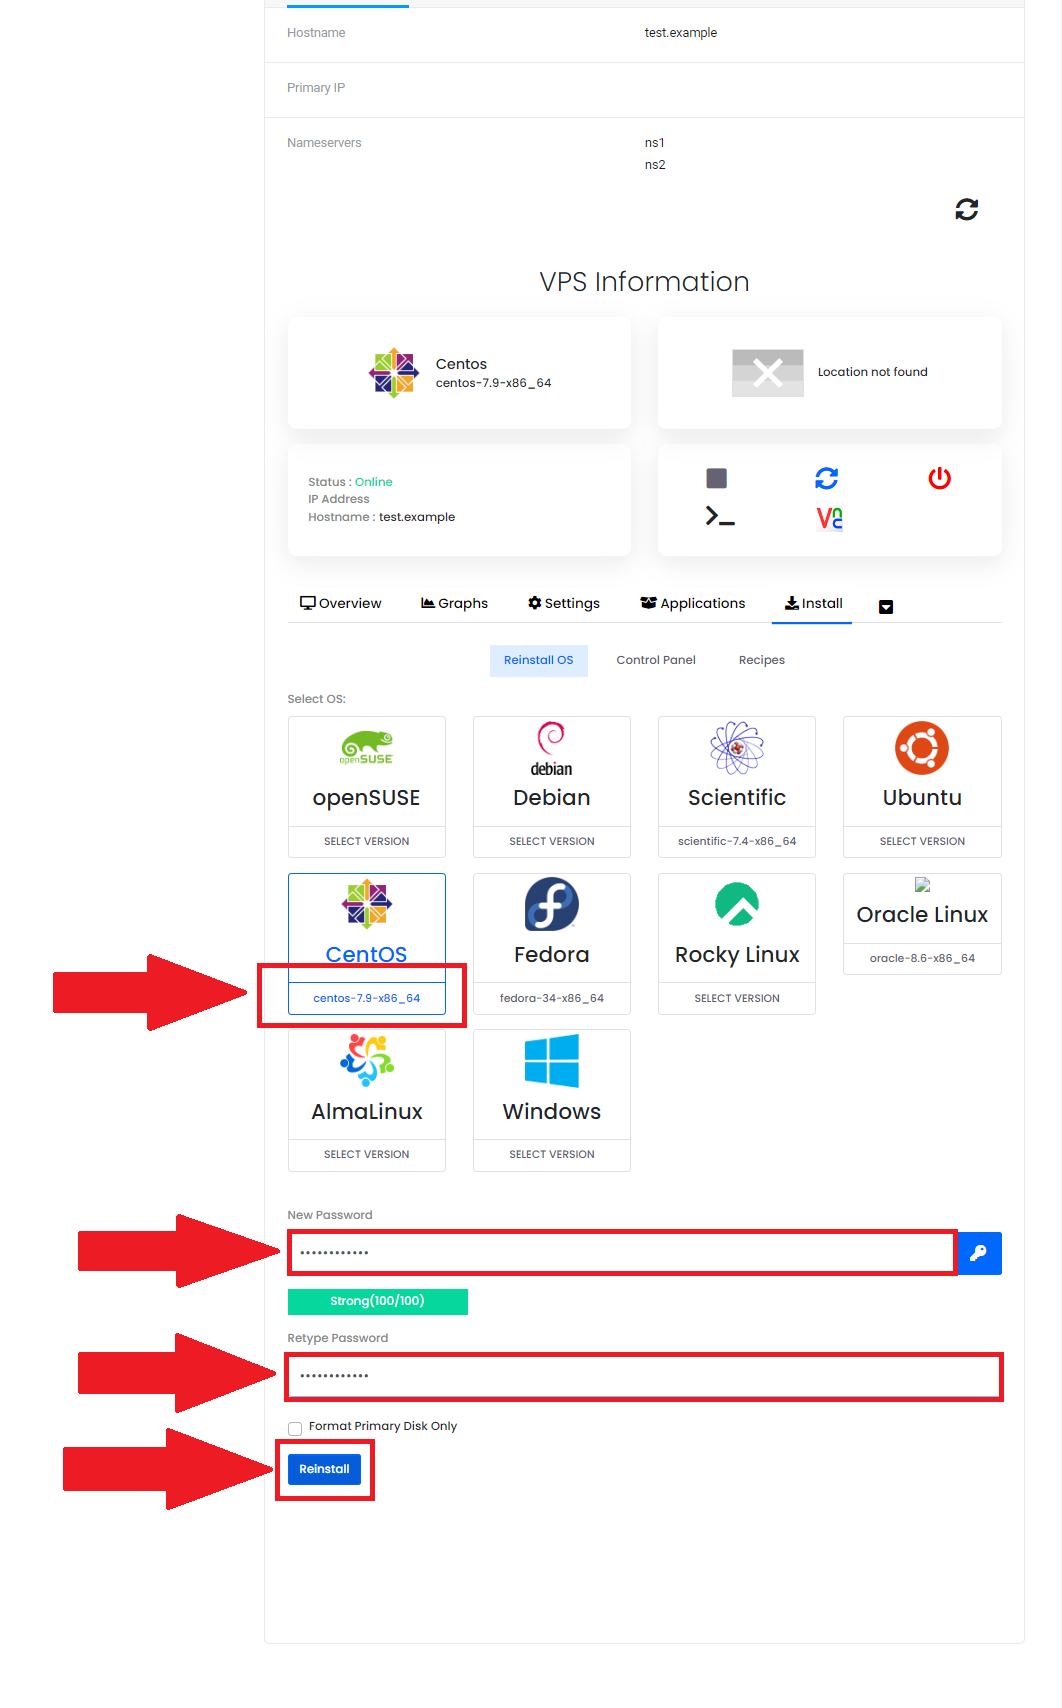
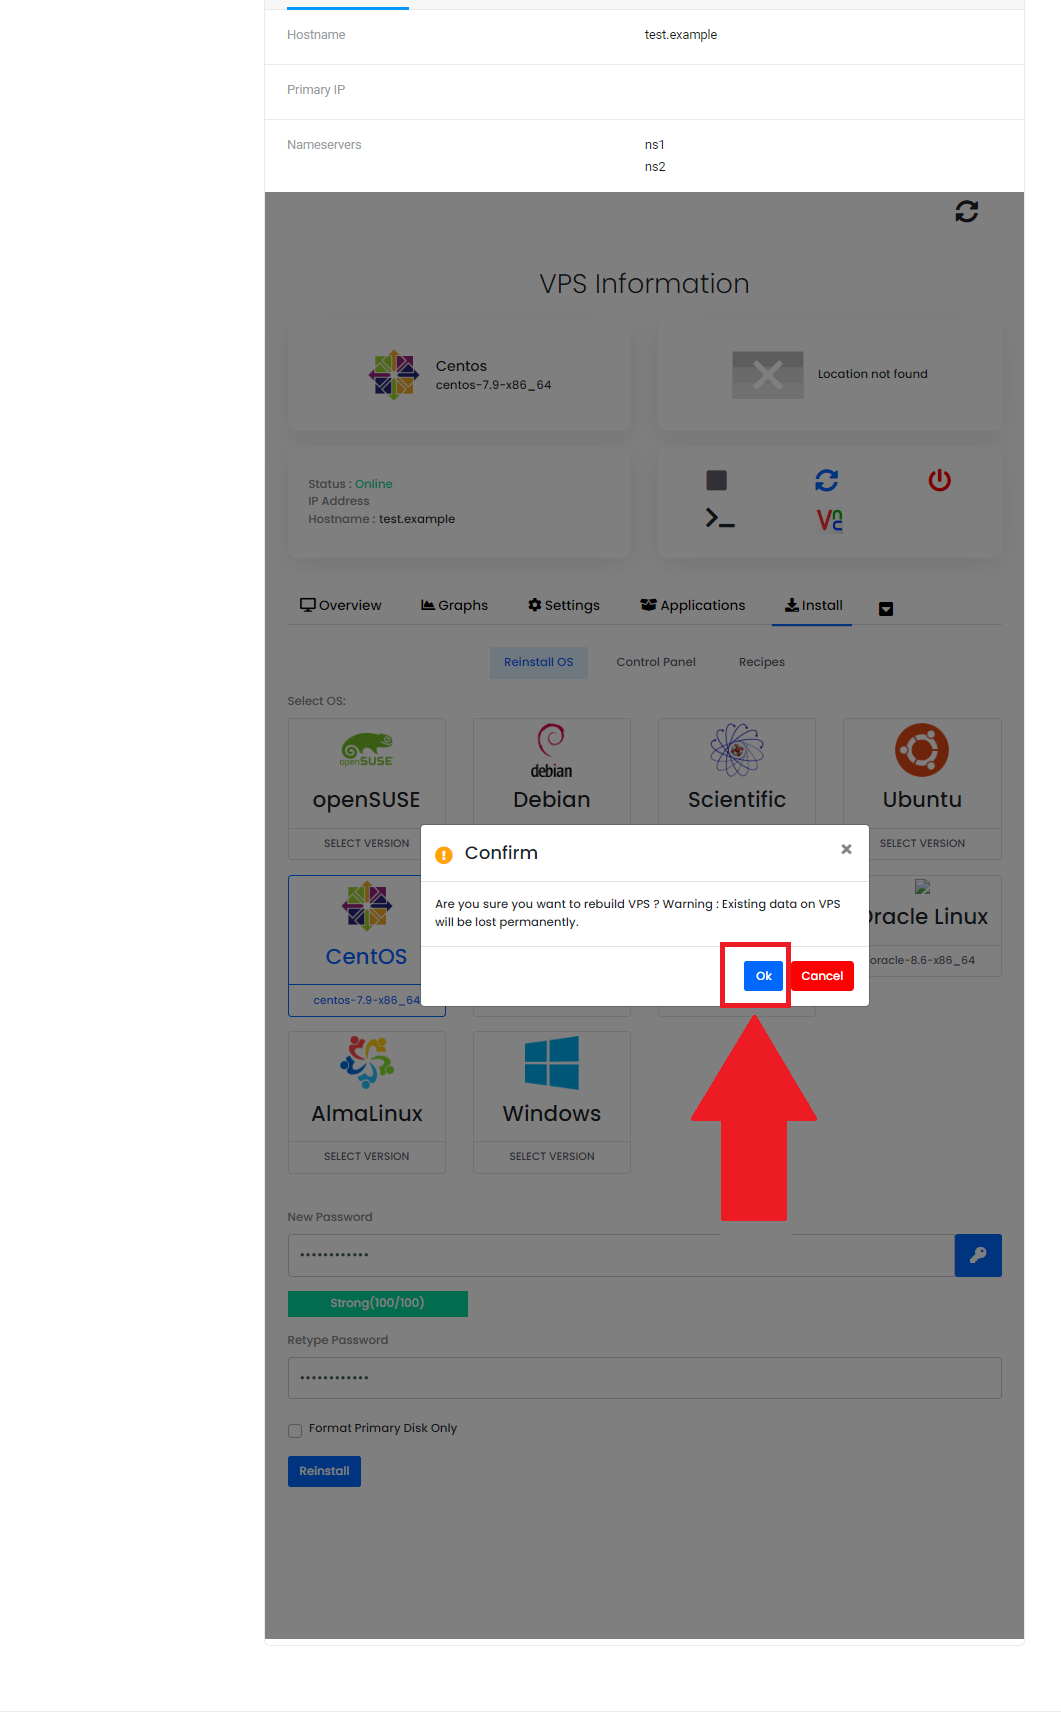
Step 4: A new screen will appear with a list of available operating systems that you can install. Select the desired OS and version by clicking on "Select Version" under the OS logo.
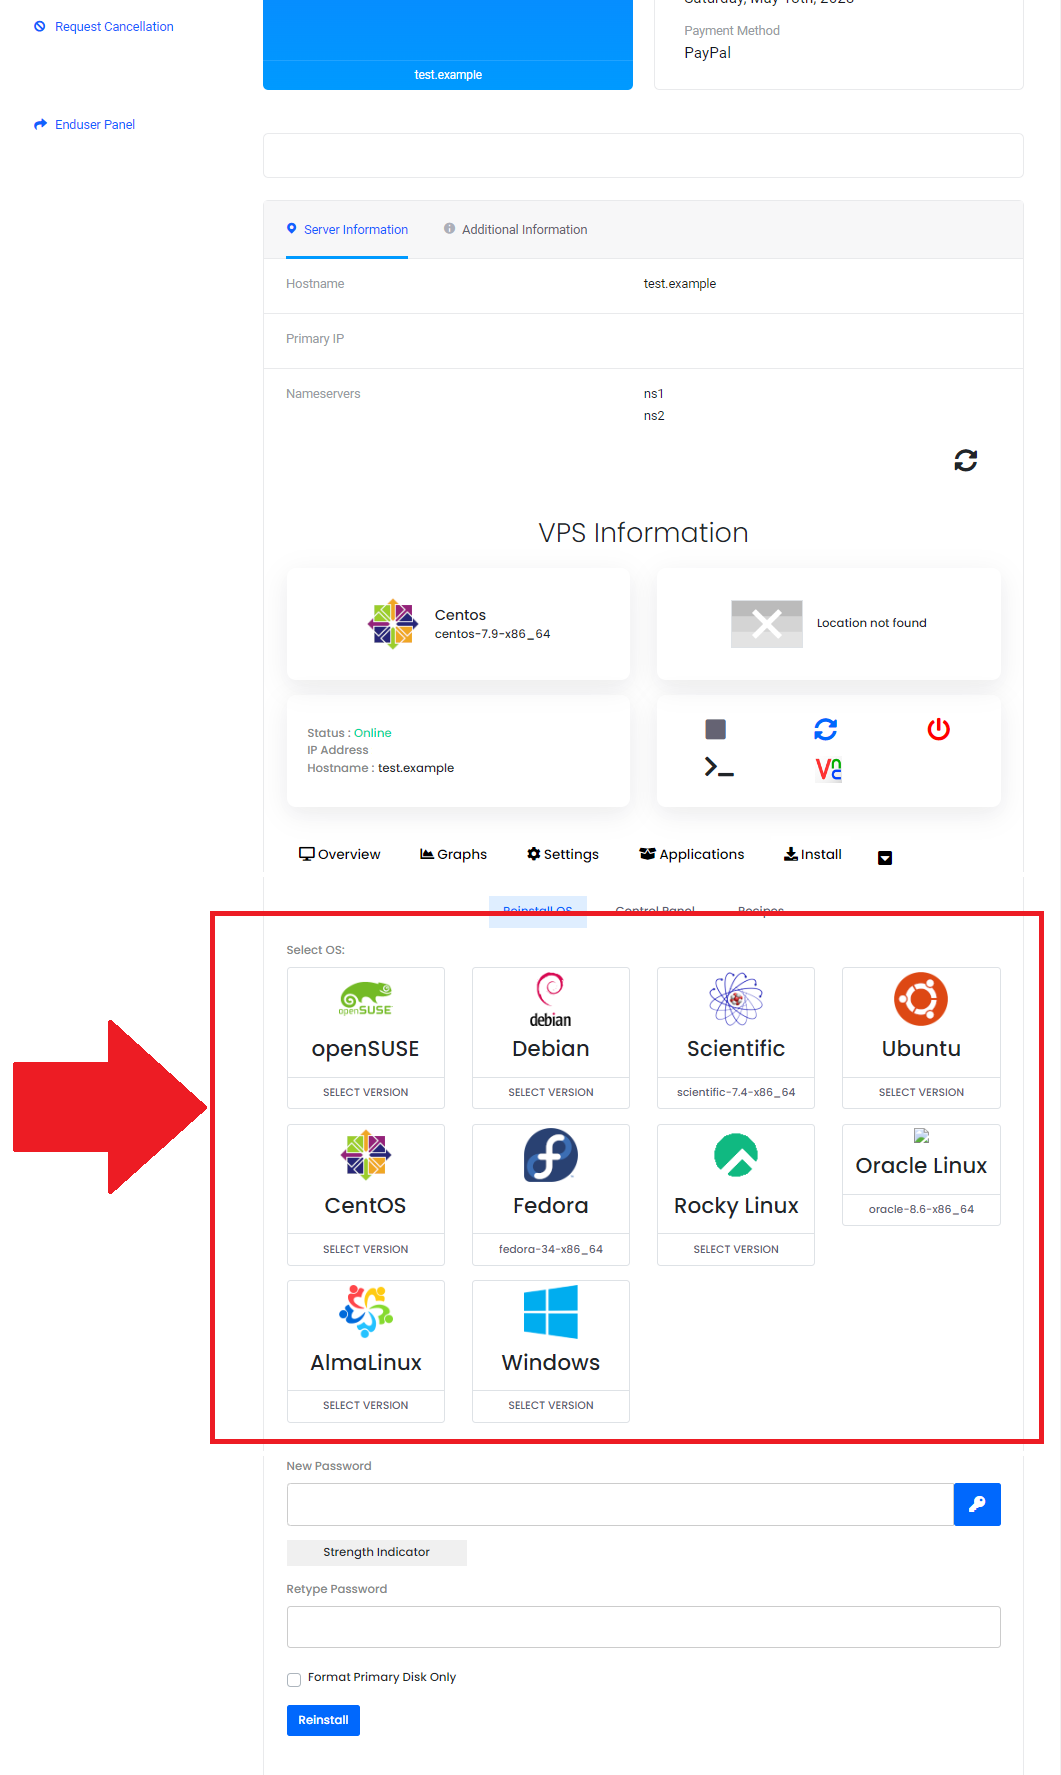
Step 5: After selecting the desired OS version, a new section will appear below, prompting you to enter a password. Once you have entered the new password, click the "Reinstall" button. Note that the "Primary Disk Only" format option allows you to reinstall the operating system on the primary disk only, without affecting any additional disks or partitions on the VPS. This option is useful if you want to perform a clean OS reinstall without losing any additional data or configurations stored on secondary disks or partitions.
Step 6: You will be asked to confirm if you want to erase the existing data on your VPS. Click "Ok" if you wish to proceed. Warning: this action will make all data on your VPS unrecoverable.
Step 7: You will see a pop-up confirming that your OS is being installed. Click "Ok" to proceed to the next screen.
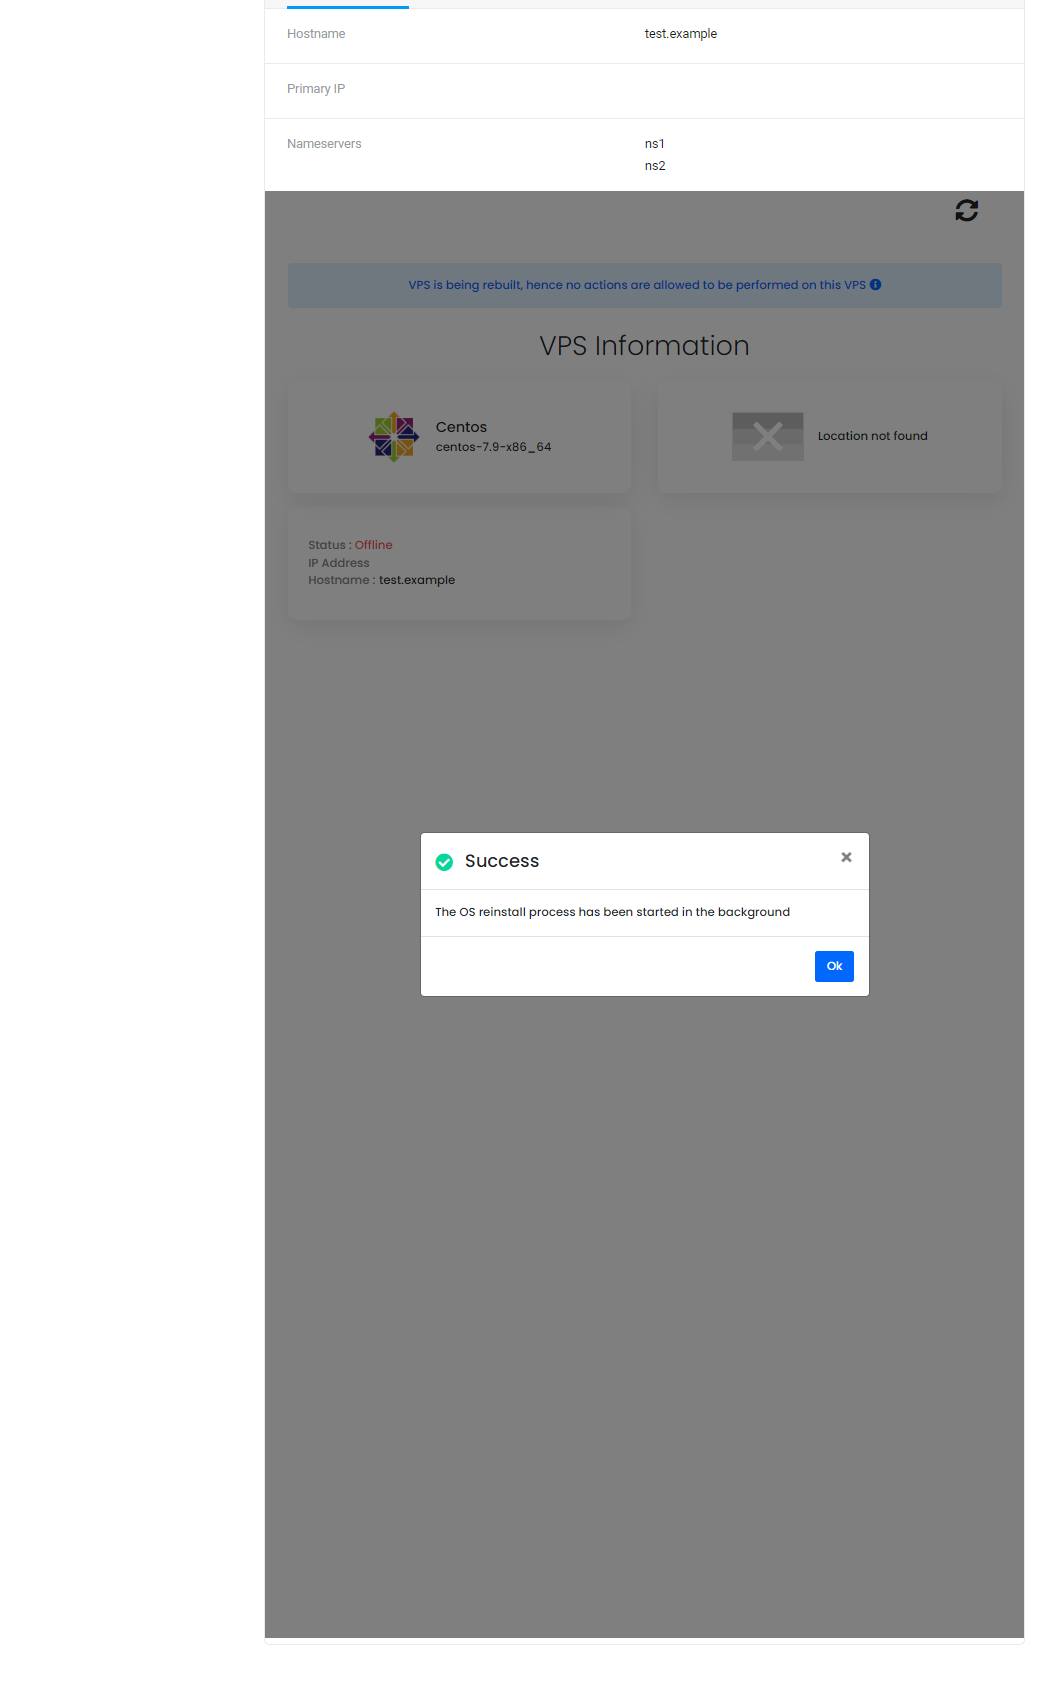
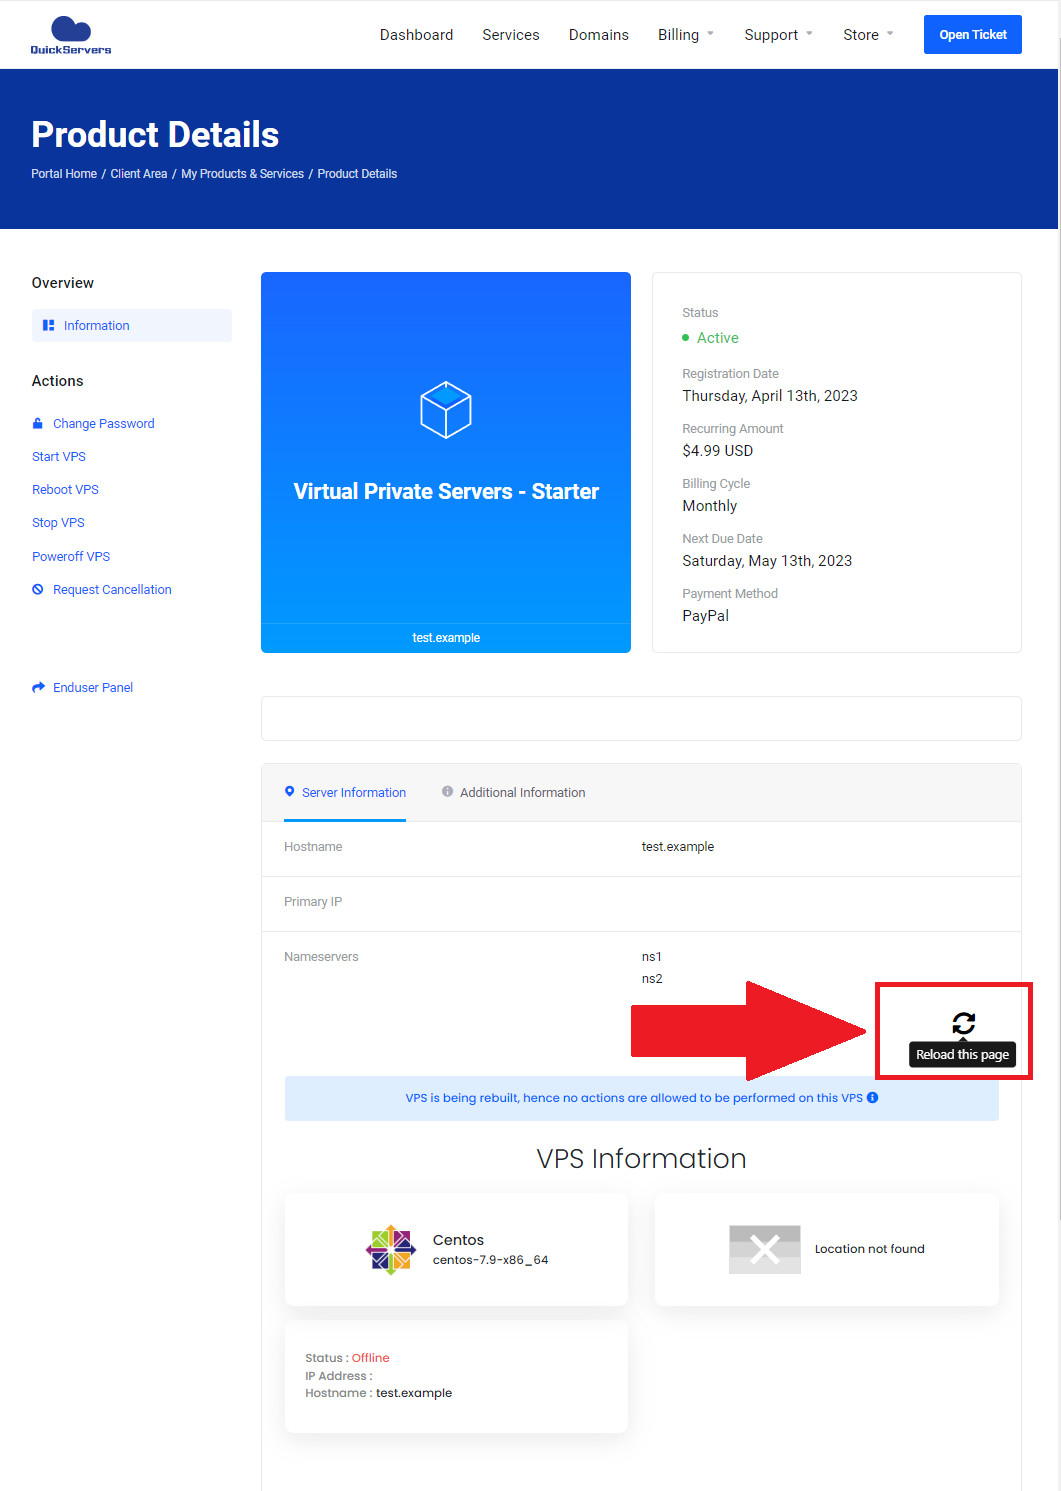
Step 8: Now, depending on the VPS size, the OS you choose, and the OS install size, you may need to wait while the OS install runs in the background. You will see a message that says "VPS is being rebuilt, hence no actions are allowed to be performed on this VPS." You can click the "Refresh/Reload This Page" button that shows under the Server Information tab to check if the OS installation has completed.
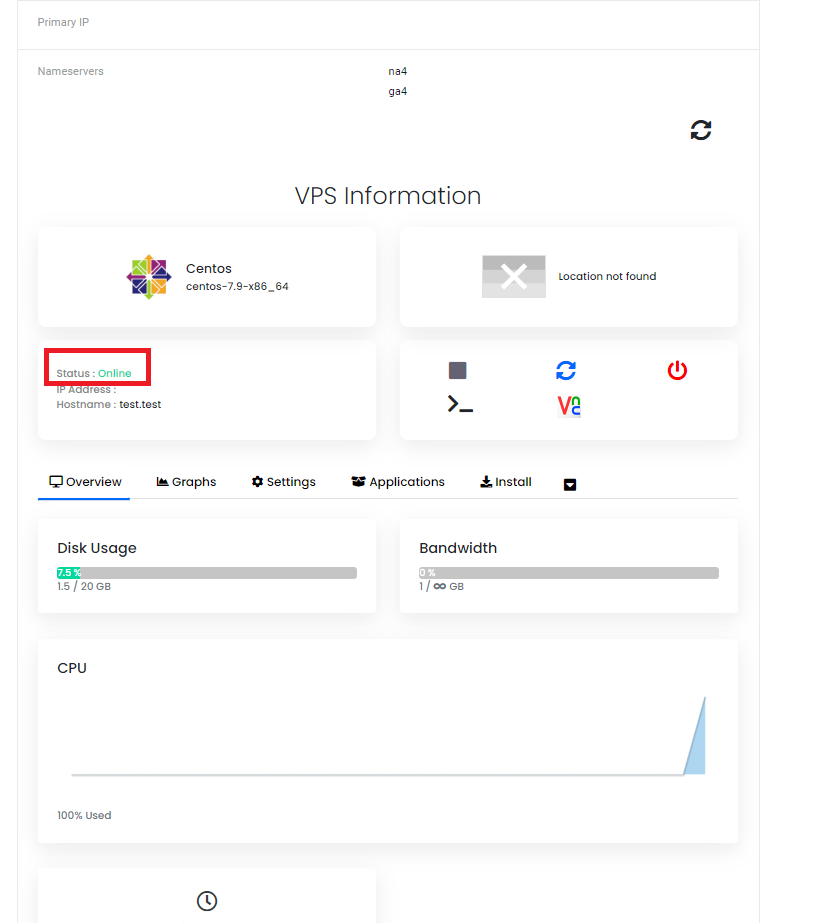
Step 9: Once the OS installation is complete, you will see a screen like the one below with the "Server Status: Online" and you can now start using your VPS.
Following the steps outlined above can significantly reduce the time and effort required to manually install an operating system on a VPS. Automating the installation process not only saves time, but it also makes it more user-friendly and accessible, even for non-technical customers. This streamlined and automated process ensures that customers can effortlessly manage their VPS operating systems without the need for technical expertise or complex installation procedures. By using QuickServers' automated OS installation process, customers can easily switch between different operating systems, based on their needs and preferences, and start using their VPS with the new OS credentials almost immediately.
Note: If you face any issues during the installation process, you can contact QuickServers support for assistance.
