Step-by-Step Guide: How to Access the VNC Viewer for VPS in your Client Portal
Virtual Network Computing (VNC) is a remote desktop protocol that enables users to access and control a graphical desktop environment of a remote server or computer, including a Virtual Private Server (VPS). VNC access provides a secure and encrypted way of remotely interacting with a VPS, giving users the ability to perform tasks such as software installation, system configuration, and maintenance through a graphical user interface (GUI). With VNC access, users can manage and administer their VPS from anywhere in the world, troubleshoot any issues that may arise, and monitor their server's performance. It is a powerful tool that simplifies the task of remotely administering a VPS, and enables users to perform various tasks conveniently, without having to rely on command-line interfaces.
Reasons why you may want to access a VPS through the QuickServers client portal using the VNC:
- Troubleshooting: The VNC allows users to remotely access and control their VPS's desktop, making it easier to troubleshoot any issues or errors that may arise.
- Configuration: Users can configure their VPS's settings and install applications through the desktop using the VNC viewer.
- Server Administration: Users can remotely manage and administer their VPS through the desktop using the VNC viewer, making it a useful tool for server administration tasks.
- Security: The VNC is a secure and encrypted method of accessing a VPS, making it a safe way to connect to the server and perform tasks.
Steps to access a VPS using our VNC viewer in your QuickServers Account Dashboard:
Step 1: Log in to your QuickServers client portal using your credentials. Once you're logged in, navigate to the "Services" section and click on the VPS that you want to access.
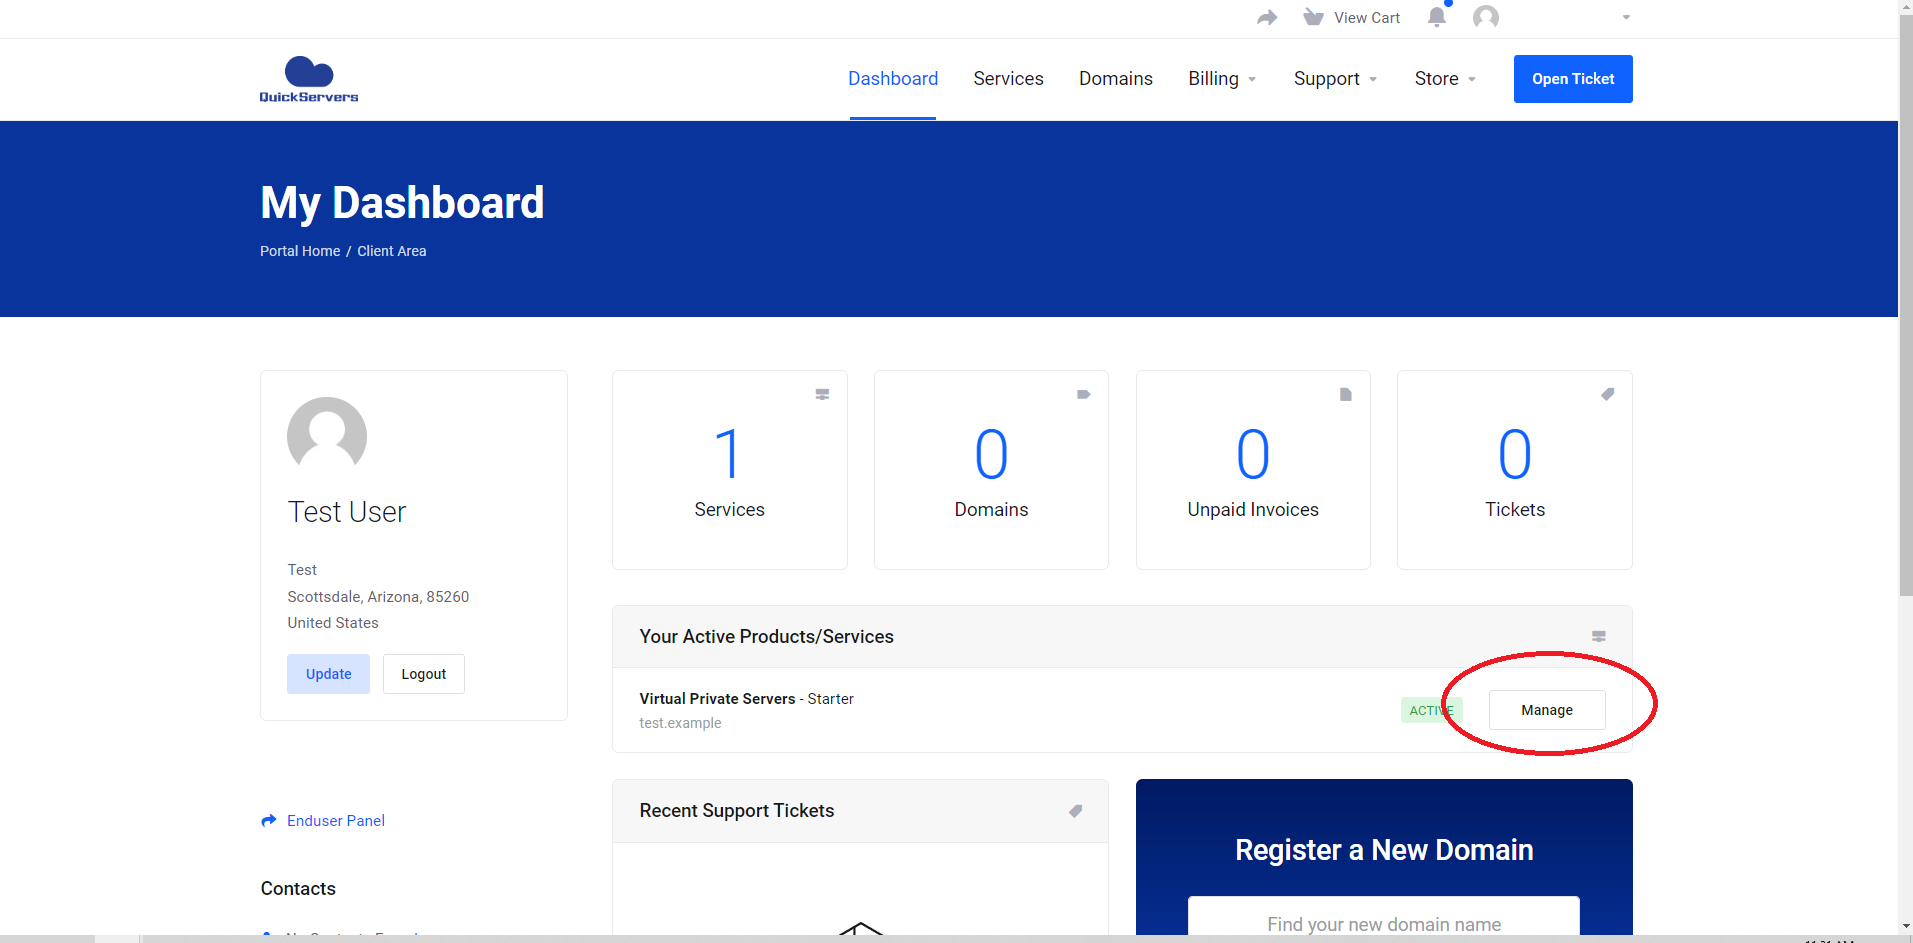
Step 2: Next to each VPS in your Active Products/Services section, you will see a "Manage" button on the right. Click "Manage" on the VPS you want to access.
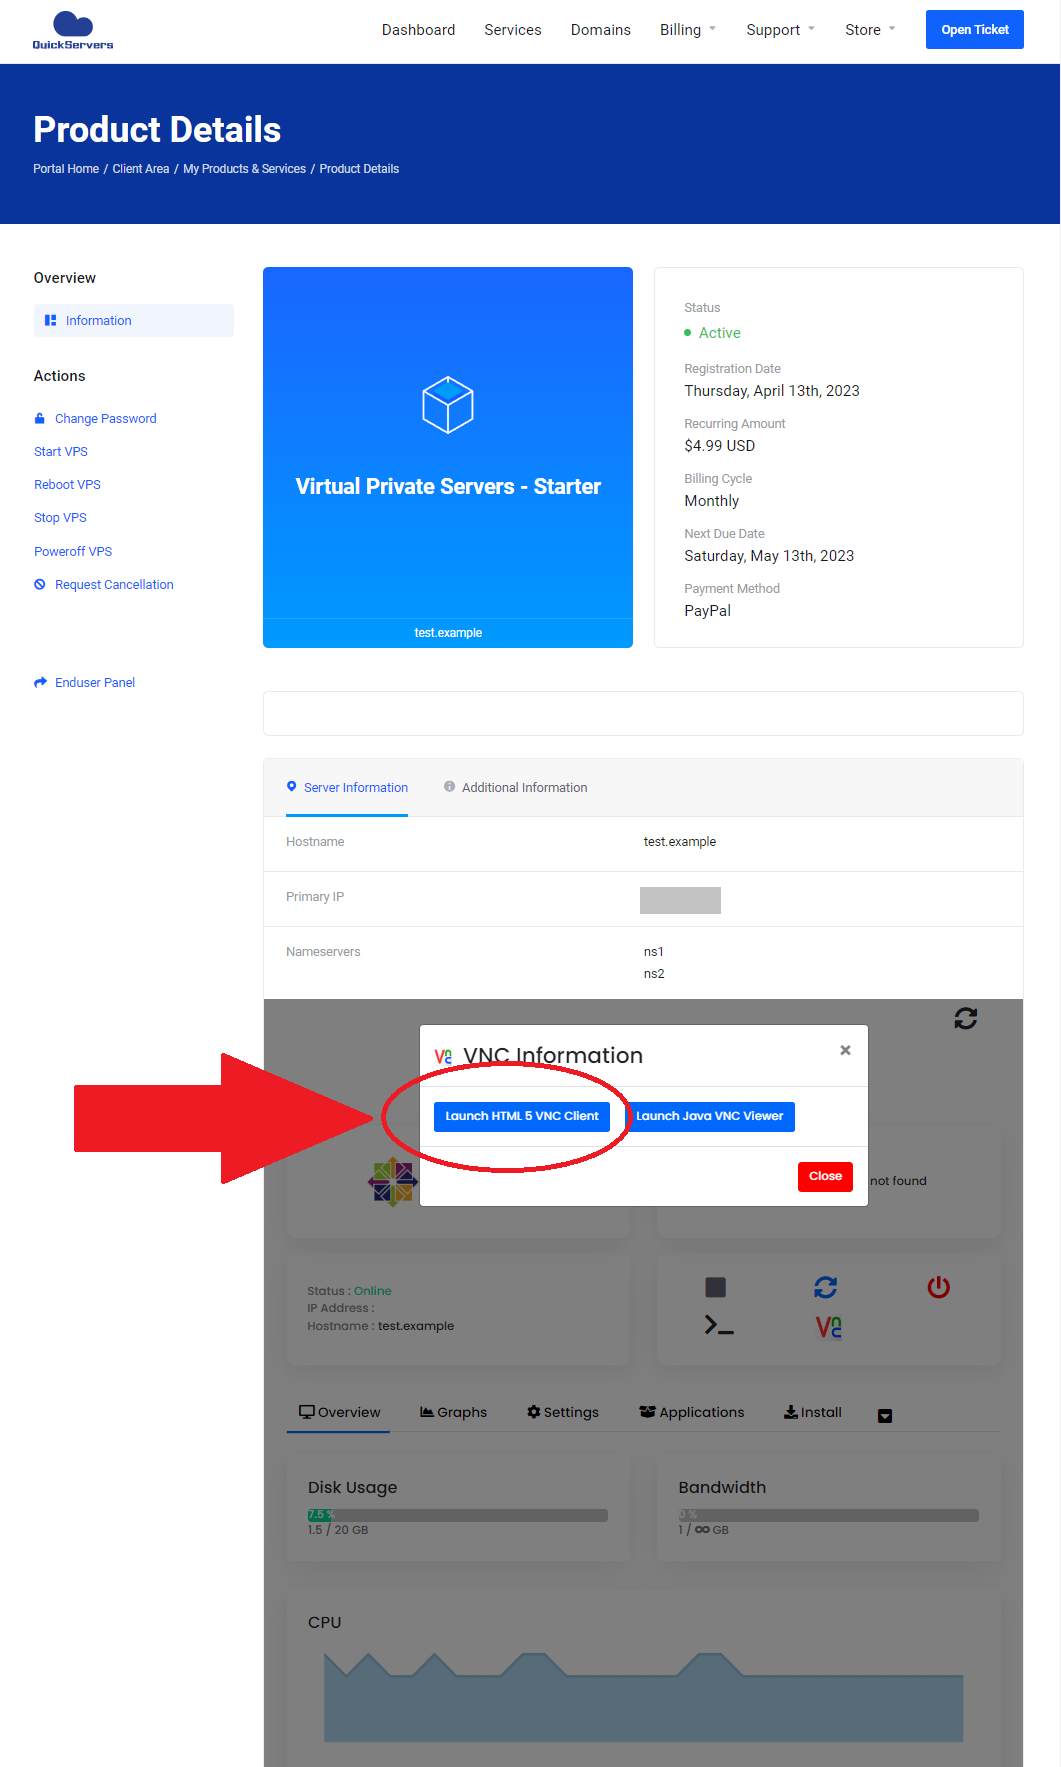
Step 3: Scroll down and click on the "VNC" icon. It might take a few seconds to load the VPS Server Information where this VNC icon is located.

Step 4: A pop-up screen will appear where you can choose to launch the HTML or Java VNC viewer. Since most web browsers no longer support Java, we recommend choosing the HTML option.
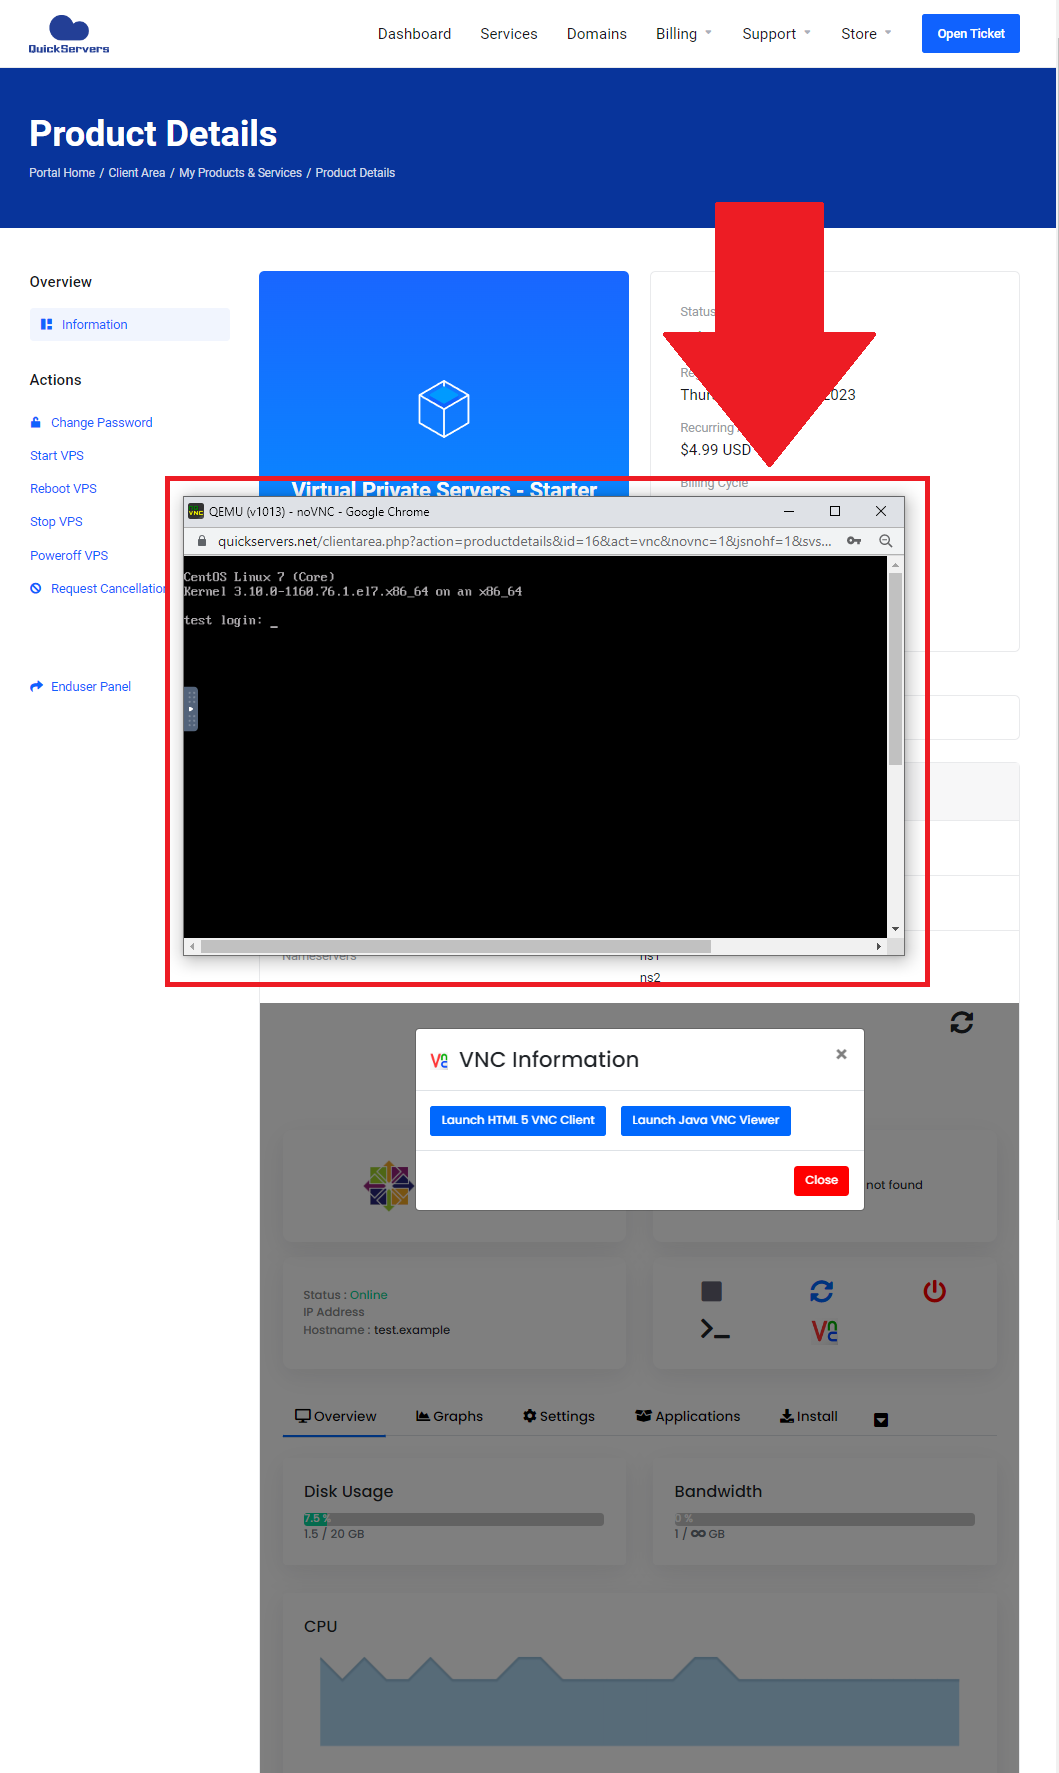
Step 5: A new window will open, displaying the VNC viewer for your VPS, which will enable you to interact with your VPS. To access the server OS, you'll need to enter the VPS credentials. If it's your first time accessing the server, the default username will be "root," and the password will be the one you provided when placing the VPS order.
That's it! You've now accessed the VNC for your VPS KVM on the QuickServers client portal. If you have any issues or questions, don't hesitate to reach out to the QuickServers support team for assistance.
